Seasonal Management - Equipment
It's a truth that over time beekeepers will amass a fair amount of equipment, but in reality you don't need too much to get started with, just a few basic necessities. It's likely that you will inherit or buy some second-hand bits and pieces from fellow beekeepers when you start, avoiding the need to go to a great deal of expense, and the benefit of getting second-hand gear is that it usually comes with a lot of great advice and support!
This is not a definitive list of what's needed but, besides the hives and bees, this is what's required to get you going: a bee suit; protective gloves; welly boots; a hive tool; a smoker; screens; queen cage/trap; queen marking kit. This is enough to allow you to open up and inspect a hive, and to carry out basic colony management and swarm prevention. Always consider apiary bio-security by maintaining your kit in good clean condition.
With regard to the hive, it will not be sufficient to have just one of each component, you should aim to have at least two of everything, and that also goes for your colony of bees. If you have only one colony then your options are limited when something goes awry, as it often does. There is quite a lot of 'moving things about' in beekeeping so having spares is essential. Other bits of kit you will need and use to work with the hive and colony are covered as we go along.
Bee Suit
You need full concentration when working with your bees, wearing the correct personal protective equipment takes away the worry and distraction of being stung and lets you focus on what you are doing.
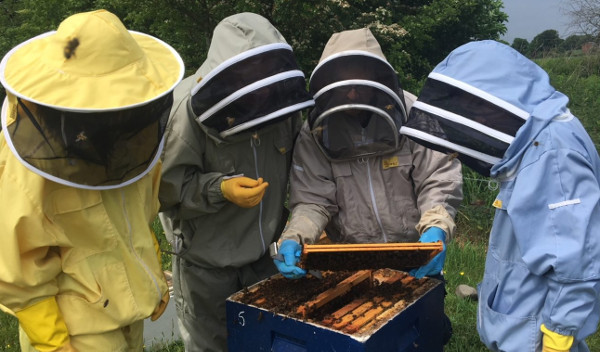
Bee Suits come in a wide range of styles, colours, sizes, and quality, buying a decent one is a good investment!
Before working with bees you need to make yourself bee-proof, as the risk of stings is ever present. One layer of thin clothing is not enough to protect you and honeybees can drill into and through material to surprising depth when they want to. They seem also to be able to sense where the weakest point in your defences are, probably by sensing your body heat. Bee suits come in many forms - in one, two and three pieces. For the novice, a full length boiler suit type is recommended, with a built in veil preferably, all of which fits well and is neither too loose or too tight. Avoid dark coloured materials that the bees don't appreciate. Bee suit zips and fasteners should operate correctly to provide full bee proofing, and should be double checked before starting. Having a honeybee crawl across your nose inside your veil before stinging you on the cheek is alarming not say distracting and painful! It is advisable to regularly wash your bee suit. As well as keeping it clean it ensures any stings and sting pheromone from the last visit are removed.
Gloves
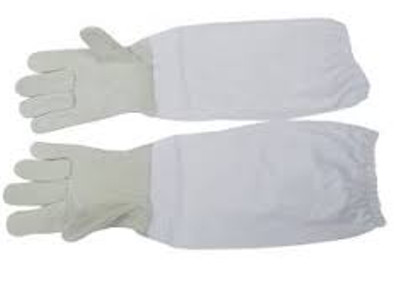
Gloves are available in various styles and quality, commonly they are a leather glove with material elasticated gaunlets. Nitrile, 'marigolds' and other disposable gloves can used, they won't offer 100% protection if your bees are in bad humour. Always ensure they seal properly to your suit.
You will see experienced beekeepers working their bees without any hand protection at all and not being stung. They do this to ensure the greatest delicacy when handling the bees and hive components but it takes great skill and knowledge to do this safely, for the novice a pair of gloves is however essential. They are commonly a pair of soft leather gloves with an elasticated gauntlet attached so that the gloves seal well over the forearm and provide double protection where there is the greatest exposure, and they can be hand washed to clean. Recent advice from the NBU recommends wearing disposable gloves to ensure no transfer of disease or infection. A pair of kitchen 'marigolds' can do the trick but make sure they are not punctured or perished, and that they seal where they cover your forearms. Use elastic bands or tape to ensure a bee-proof seal. Keep your gloves clean as with the bee suit.
Footwear
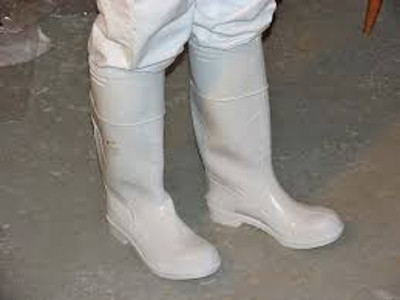
Wellies, the simplest and safest solution to bee-proof footwear in the apiary.
Wear a pair of welly boots. Bees frequently fall on to the ground during hive manipulations and will try to climb back up to the hive entrance. The will equally climb up your trouser leg given the chance, leading to very uncomfortable stings. Ensure that the legs of your bee suit are tucked into, and not over the top of your wellies. Other types of footwear are not recommended unless designed specifically for beekeeping as a sting on the foot or ankle is not only painful but quite debilitating. The trick is to be completely bee-proof, remember bees frequently fall on the ground and will always crawl up the way!
Hive Tool
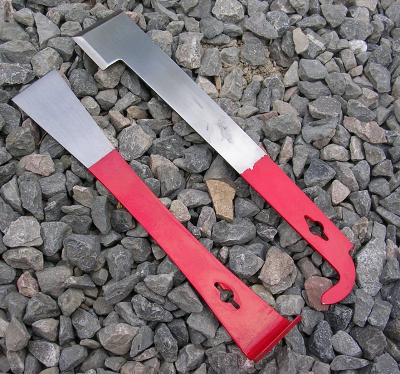
Essential for working on hives, use only purpose designed hive tools in the correct manner to avoid component damage.
Honeybees are great engineers, they construct very precise structures in the hive, and they seal and secure everything and anything in the hive with either wax comb or propolis. When you attempt to separate the hive components during manipulations, you invariably find that the boxes are propolised together, necessitating the use of a tool and some force to get them apart. The same applies when you try to remove brood or honey frames, they are usually stuck fast together and to the hive. A hive tool is a purpose designed tool used to prize boxes apart and frames up and out without damage. They are also designed to be used to cut, scrape and clean wax and propolis from boxes, frames, queen excluders etc. There are a few different designs available, they are all good, it is just a matter of personal preference. Hive tools should be brightly coloured to avoid lost in the grass. Use of unorthodox tools is not recommended as hive components can easily be damaged.
Smoker
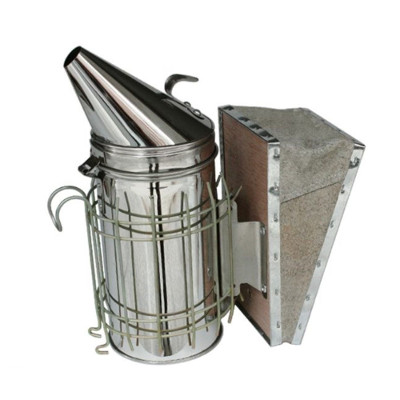
Smokers come in various designs and quality, get a decent one and only use appropriate fuel.
Pacifying and distracting the bees while you perform hive manipulations greatly helps keep the bees occupied and discourages defensive and stinging behaviour, most times, but not always! Normal procedure is to give the front entrance and under the crown board a couple of puffs then waiting a couple of minutes before opening the hive. Smokers are largely a type of container in which material is burned and the smoke puffed out with the attached bellows. Smokers are made from copper or stainless steel and come in different versions and sizes, including electric versions. They are all good, however the trick is getting them lit and keeping them lit. Use suitable dry material to burn such as smoker fuel, wood shavings, pine cones, dry grass, corrugated cardboard, hessian, but avoid materials which may be fire-retardant, or give off noxious fumes when burned.
Lighting the smoker - Wood shavings sold as pet bedding are an ideal, cheap and convenient fuel. Start by filling the smoker with the shavings then use your hive tool to create a clear air channel down the side that the bellows blow into. Light the small ball of paper and drop it to the bottom of the channel then allow the fire to grow giving it a gentle puff or two. As the fire grows add shavings slowly into the channel until it is smouldering well then close the top. Keeping the smoker vertical during use will ensure it stays alight, lay it on its side to extinguish. Don't be tempted to point the smoker at your veil to shoo the bees away, the smallest spark will make a bee sized hole in it instantly! Care should be taken when using the smoker in high summer when apiary vegetation is dry, and ensure it is fully extinguished when put away using an old champagne cork or similar to seal the spout before putting it in the back of the car!
Don't forget to keep a lighter/matches and some paper in your toolbox for lighting the smoker.
Screens
When you open a hive up not only will the disturbed bees fill the surrounding air but so will a strong scent of wax, honey, pollen, propolis etc which will attract not only wasps who will readily rob the hive, but also bees from neighbouring colonies who will happily come in and rob it as well and fight with the hive guards while they are at it. Robbing also has hidden dangers in that pests and diseases can be quickly transmitted this way and should always be discouraged. Screens are small sheets of sturdy but soft material slightly bigger than the dimensions of a hive box, and would normally have a wooden bar at either end to weigh them down and stop them flapping around. Use them to cover the exposed brood chamber and honey super during hive inspections. Use two on the brood chamber and move them together as you go through the frames keeping all but the space where you removed a frame from covered. Screens can be purchased but are usually home made from an old bed sheet or similar material which will keep the bees contained and pacified. Three screens are usually enough to do the job (two on the open brood box and one to cover the exposed super) and can be rolled up together when not in use. Keep your screens clean to avoid cross contamination.
Queen Cage / Marking Kit
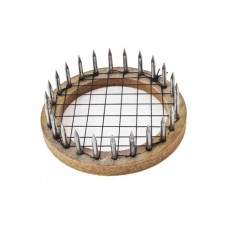
A simple press in cage that traps the queen but allows trapped workers to escape.
Marking the Queen - one of the most important jobs of the year! Finding the queen can be tricky especially during the season when colony numbers have built up and the hive is full. Marking the queen with an easy to see colour on her thorax makes finding her on a busy frame so much easier. Finding the queen is a must when it comes to swarm prevention or when you are creating nucs. Normal practice is during the first full inspection in April, to find and trap the queen on the comb, then mark her with a suitable medium before releasing her unharmed back on the frame. There are various traps available, some easier to use than others, but a simple circular netting trap which is pressed into the comb with a steady hand to hold the queen still is probably the easiest to use. White queen marking solution is sufficient for one or two colonies where the beekeeper can remember the age of the queens. For more colonies there are coloured markers which indicate specific years. White is the easiest to see later in the season even when it has dirtied down a bit, it is still clearly visible. Tippex correction fluid or similar is suitable and can be applied with the tip of a matchstick. Other medium may be suitable but it must dry quickly and not contain anything that is toxic to bees.
Feeders
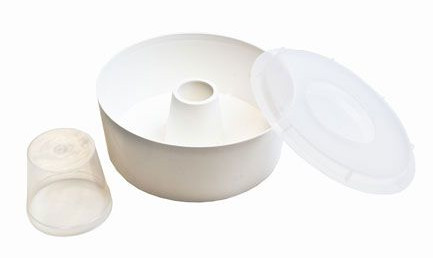
Rapid Feeder, holds 2.25 litres (half gallon) syrup.
In addition to basic beekeeping tools the need to supplement what stores, or lack of stores that are available to your bees is something every beekeeper has to be prepared for bearing in mind just how quickly a colony can perish through starvation. Having a means of quickly delivering sustenance to them is a necessity, there are several different types of feeders available to chose from but for ease of use and for something that allows bees quick and easy access to what they need right where they need it a 'contact' or 'rapid' feeder is the best option. Both types are placed directly on top of the colony allowing them direct access.
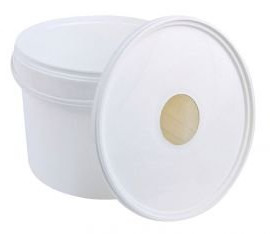
Contact Feeder, sizes to hold 1.1, 2.25, and 4.5 litres (quarter, half, and one gallon) syrup.
Rapid feeders are placed on top of the clearer hole in the crown board and allow bees to crawl up and over to directly access the syrup while contact feeders also placed on the crown board allow bees to suck the feed down through a fine gauze. Both are housed in either an empty brood or super on top of the crown board depending on size and type and both are efficient at doing the job. While contact feeders can provide up to 4.5 litres of feed at a time the rapid feeder's 2.25 litre capacity can be replenished easily without releasing the bees or exposing them to the elements. You will need one feeder per colony.
Other Equipment
Boxes and frames take a bit of punishment from their frequent use and movement, and occasionally need repairing. While some maintenance and repairs can be affected out of season back at home others, such as the bars of a frame coming apart during inspections, need immediate attention. A small pin hammer, combination pliers, craft knife, waterproof duct tape, coloured head drawing pins, and a selection of frame and box nails will be enough do small repairs on site. Don't forget to take a notebook and pencil to record what you have done and what you will need next visit. Experience will dictate what tools and equipment you will need in your apiary tool box. Taking time to plan your apiary visit activities beforehand will also help ensure you don't forget anything important.
Equipment Hygiene
Frequent cleaning - keep tools and equipment clean to avoid transfer of disease and pests between colonies and apiaries. Wash metal / hard tools in a suitable medium such as a solution of sodium carbonate (washing soda) mixed at 1kg crystals to 5ltr of warm water, add a little dish washing liquid to remove stubborn propolis. Wash soft material / textile equipment according to manufacturers instructions.
Equipment Summary
Never go to your aiary empty handed, there is always something to do!- Bee Suit
- Gloves
- Boots
- Hive Tool
- Smoker, fuel, paper, matches/lighter
- Screens
- Repair tools - hammer, nails, craft knife, pliers, gaffer tape
- Notebook and pencil
- Anything else needed for your planned visit.
About the 'My Beekeeping Kit' website.
Contact Iain Dewar for enquiries, suggestions, corrections and contributions for improving the notes. Always welcome!